Recommended Age: 3 years and onwards
Purpose: To refine the child’s tactile sense and for the child to acquire better muscular control through lightness of touch
Level of Parent Involvement: Medium, the adult must make the touch boards and then present the exercise to the child
Prerequisites
- None
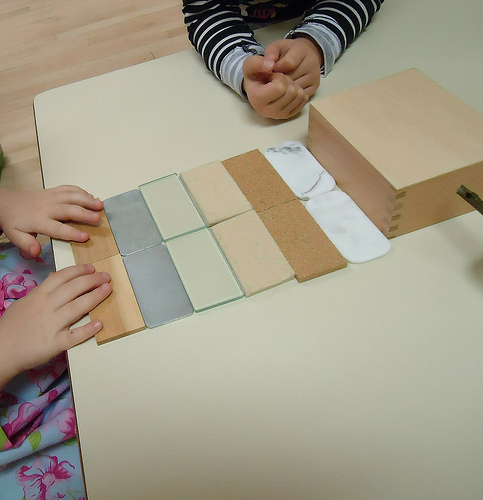
Materials
- Touch boards PDF
- Sand
- Craft Glue
Preparation
- Place glue on the left side of the first board and sprinkle with sand, leave to dry
- Place glue on each alternating section of the second board, sprinkle with sand, leave to dry
Steps
Board 1
- Invite the child letting them know you have made touch boards to show them
- Show the child how to use the board
- Left hand anchors the touch board at the bottom left corner
- Right hand lightly strokes the left side of the touch board from top to bottom 3 times
- Invite the child to have a turn
- Repeat as above, stroking the left side, this time saying “this is smooth”
- Invite the child to have a turn
- Repeat as above for the right side of the touch board
- Invite the chid to have a turn
- Repeat as above for the right side, this time saying “this is rough”
- Invite the child to have a turn
Board 2
- Show the child how to use the second board
- Left hand anchors the touch board at the bottom left corner
- Right index and middle finger strokes each partition from top to bottom, working from the left side of the board across to the right
- Invite the child to have a turn
- Feel as above, this time naming each partition (rough, smooth, rough, smooth)
- Invite the child to have a turn
- Give the child commands, for example: “Put your thumb on smooth, point to rough, can you feel all the smooth parts, can you feel all the rough parts”
- Now tell the child “put your finger on here and tell me what it’s called” (do for rough and smooth requiring child to name both)
- Child may now work independently with both touch board 1 and 2
Variations
- None